Showing posts with label hexagon. Show all posts

Saturday, November 26, 2016

travel here and there

We've been visiting back home in Iowa for Thanksgiving.  We had a yummy dinner at my brother and sister-in-law's place on the farm.  We had both wild and domesticated turkey and all the necessary side dishes.  The wild turkey was contributed by my nephew, Spencer, from a spring hunting foray.

Back at my mom's we took care of the list of odd jobs that she needed doing.  And had some reading and sewing time.  I finished up these 3 hexagon pieces, each made from 6 triangles.  They don't necessarily look like they go together, but they might all end up in the same quilt!


The maple leaf print was a souvenir from a trip to Fernie, British Columbia, last May.  If you are ever there, make sure you visit the Cotton Tree Quilt Shop.

I've been admiring some of the artful decor here at my mom's, so I took some pictures to share.  My mom and dad traveled all over the world, and brought back interesting things from all over.


This plate is displayed on the mantel and mom can't quite remember where it came from.  This label is on the back--


 Looks like Greek to me!
The colors and designs are very impressive.

These pieces came from Russia, from Petrozavodsk, a town northeast of St. Petersburg.  They went there to teach English in a Russian school for several weeks.  These were given to them in gratitude for their volunteer work.  The colors are very rich and vibrant.  The gold seems metallic.  They are made of wood.


Also from Russia, but not sure exactly where.  I love the shades of blue and red and gold in the figurines painted on a large (about 5" high) wooden egg.  I would love to know the stories behind the characters.


Thursday, September 22, 2016

feeling lucky!

I know there's a lot of problems all around the world, and many things to obsessively worry about it I choose to go that way.  However, I'm am trying to maintain a positive feeling in my everyday life, without being Pollyanna-ish.  I just had a great time with my mom visiting us, and a quilt retreat, and a relaxing weekend.  I am even feeling really good about the fact that we have done a thorough sort and purge and reorganization of another storage closet!  

And some really fun things to look forward to on the horizon, too-- Dan visiting and bringing Jessica to meet us, a couple more quilt retreats planned, and, drumroll please, 
another grandson due in March!  Woo-hoo!

2 weeks ago while on quilt retreat, a few of us took a field trip to a new (to me) quilt shop in called Altoona, WI.  That's on the eastern border of Eau Claire.  It's called Stitch Supply.  I will definitely be going there again!  They have the largest assortment of Cotton + Steel fabrics that I have seen.  It kinda required me to buy several fat quarters of some of the prints that we haven't ordered for Bear Patch.  Don't they look fun?!  Odd bugs, fountain pens, rotary dials, matchsticks, jacks...
Good additions to my fabric gallery!


My mom stayed with us for a few days after that retreat, then flew out to Whitefish, MT, to visit Dan.  She can get a direct flight from Minneapolis to Kalispell, which makes it easy.  She was there 5 days, then came back to our house for an overnight before returning to Iowa.  Before she left Montana, she asked if she could bring me anything.  I jokingly said I would love a fresh huckleberry pie.  Well, she carried a piece of that pie all the way back to me!  I was so excited!  I'm eating only a little at a time so I can make it last!


After finishing up my recent garment sewing experience - and I will definitely try to get a picture of it in action - I really wanted to get back to sewing some quilt blocks.  So I picked up where I left off at retreat and went back to work on these faux wedding ring blocks--

I have some sewn together, and the rest in different stages of assembly.    I would like to get this done to put on the class schedule at the store after the 1st of the year.  
I did complete another small quilt, below, that could also become a class.  It's called Timbuktu, and I started working on it last January.  It requires the use of the X-blocks ruler.  After I got the quilting done, I couldn't remember if I had binding for it already picked out.  A lot of times I do that, and I usually put a little label on that piece of fabric and store it in a little box.  Labeled "Bindings", of course!  I looked all over the place for a cut of that green fabric because it seemed logical to me that I would have chosen that for the binding.  I never could find it, and it finally dawned on me that maybe it was a different fabric.  I found what was left from the backing fabric, and there was plenty of that to cut binding strips, so that's what I did!


Last week at Bear Patch, we received an order that included these hexagon pre-cuts of the most recent Tula Pink fabric line.  They work just right with my 2" hexagon papers for English Paper Piecing, so I have been getting those ready to stitch together.  Tonight is our employee sewing night at the store and I will be taking that along to work on.


I recently wrote about our English paper piecing group at Bear Patch, and I included the recipe for a yummy dip that I made.  Today I am making it again to share with my co-workers!  Time to get to the grocery store and pick up a few things needed!  I hope your day is lucky, too!

Sunday, April 28, 2013

some updates

I have finished up some things and it is time to share with you!
Last week, our Busy Fingers Hexie Group at Bear Patch met for our monthly gathering, and I was able to share this little pillow--


This was a great fabric with the hexies printed in wonderful colors, by Riley Blake.  Makes such and easy little pillow cover without a single bit of English Paper Piecing!   Bordered by Kona white and bound with the stripe that matches from riley Blake.

Also, finally have a finish on this--

Sewing Scissors by Bee In My Bonnet

 And don't you just love it when you can find just the right binding?

Also, I have just been recovering from a bit of brain sprain after 2 full days of a wonderful Bernina Software Seminar--what a lot of great information to absorb and dream of ways to apply new ideas to my future machine embroidery projects.

Tuesday, April 9, 2013

a little knitty

Over the past weekend, I had some free moments and a baby sweater to finish.  I started this earlier this year, and need to get it done while it will still fit my Ian.  The pattern is in a book by Debbie Bliss, and it is appropriately titled Letter Sweater.  I have all of the components finished now, and even got to try it out on Ian to make sure it would fit over his head.  He has been putting a lot of energy into growing that brain, and I already have had trouble getting a t-shirt to fit over that noggin!  I have clipped together the sleeve and sides.  Then I went looking for my trusty knitting bible--Knitting For Dummies.


And I learned a few important things.  I haven't made a sweater like this before, so didn't know that I should wet block it now, before making those final seams.  Wet blocking is pretty simple, I always do it for the other knits that I make.  I gave it a gentle handwash in cool water and a bit of detergent.  Then I laid it out on a spare bed on a towel, and used a measuring tape and some pins to "stake" it out into the correct shape.  As soon as it is dry, I will be back with my Dummies book learning how to correctly finish those seams.  I really do like this sweater, and have already been wondering how to convert it into a vest and make it a bigger size for next year.  So you may not have seen the last of this little knit!

I also wanted to share another idea with you that I put together for my hexie group at the store.  I always have a bonus project for them each month, and this is one of them.  I found this lidded plastic storage box in the $1 section at the Target entrance, and went to work with needle, thread and glue.  A little batting, four 1" hexagons on a background and a strip of ribbon for the edge made up into a nice little trinket or sewing box.  I love special little storage containers, whether re-purposed or scavenged or  discovered at a store.  Making them over with my own style brings a little feeling of accomplishment!

Monday, April 1, 2013

progress report

My vacation getaway is winding up with 2 nights in San Francisco, a wonderful city that I always love to visit.  Having my sister here is the best part!  This morning we had a chance to do some window shopping and some actual shopping.  Even made a stop in the nearby Daiso shop, the Japanese $1.50 store, according to their advertising!  I am always fascinated by all of the little containers and boxes that they have, something different than what I usually find back at home.

During our movie-watching time last night, I was able to stitch together another little hexagon block--


I love the little bug in the middle!

And I have had my knitting along, finding minutes here and there to make a few more rows.  I am at 2.5 inches--yay!  I'm aiming for 6" and then will decide if that is enough.  This is about 5 feet long, and these rows do take a bit to complete.  Tomorrow I will be occupying my waiting and flying time with some more rows!

And a parting shop of the grounds at Asilomar--

Thank you, California, for a great visit!

Monday, March 11, 2013

hello again

A week and a few days ago, I showed you what was happening on the retreat I attended and helped host.  Initially, the plan would have required much of my attention to help with the meals, preparing, serving, and clean-up.  Well, I was liberated from the role of scullery maid thanks to Debbie's very wise decision to employ a local caterer to help with most of that--wonderful!  So a few of my own desires were fulfilled and I really enjoyed my time.

I put most of my new hexie blocks up on the design wall to get an idea of how it was shaping up.  

This is such a contrast to my Civil War version:


These are all the same block designs, just a whole different world of fabrics.  I am using a different design for putting them all together, also.  In the second picture, you can see a traditional setting style with equilateral triangles inserted all around the hexagon blocks.  Well, actually, that picture mostly shows blank spaces, but you can get the idea.  For my newer version, I am using little rectangles of white as spacers between blocks, and a little bitty triangle at the corner intersections to get the spacing right.  Took me awhile to figure that one out, I didn't have any pattern to follow.  It was one of those puzzlers we all encounter, when you can picture what you want but don't know how to make it happen!  And it was one of those "Ah ha!" moments when I should have been sleeping, when it dawned on me what shapes needed to be where.  Some of the blocks in the middle of the red and blue have borders sewn on, and there are quite a few more to go.

Now on the reverse side of the sewing spectrum, I turn from tedious handwork to the marvels of computerized sewing:

 A closeup of one fourth of the block below, showing a little detail.  The block is built with applique and thread in different combinations.  The sorta light blue areas aren't fabric, it's a variegated thread on the cream background.  The light brown points with pale grey circles is another fabric.  The quilting design on the cream background is all computerized from designs by Sharon Schamber, an outstanding professional quilter whose work I have seen in shows and classes.  I've always wished I could quilt like her, and now I can!  Here's the 4 pieces laid together:

They will be joined together but I am waiting for my next class to learn the correct way to do that.

Here's a little pillow top design that I put together as a pattern and distributed at our recent Bear Patch Sew Creative Event:
Tumble Rumble by Emmaline Design

I made it with the One-derful One-Patch Tumbler Template by Marti Michel.  A very neat tool.

And here is a new pattern I have written:
Spring Fling by Emmaline Design
A computer (EQ6) rendition of it, until I get the real thing quilted and ready for a picture.  It uses the Creative Grids 2 Peaks in 1 ruler or the Tri-Recs tools.  

Our big lifetime achievement last week was the first birthday of our first grandson!  We had a little family birthday party, and were pleased that my mom and dad could join us, too.  Wonderful that Ian knows his great grands.  Poor guy wasn't quite at full steam for a couple days, because he got pinkeye for his birthday and he was kinda irritable with that.

 But itchy eyes don't stop the birthday cake!  He was fascinated by the candles, and then happy to dig into the cake and frosting!   Since he wasn't his usual smiley self, our picture below looks kind of funny, but makes a good memory of the day--

He looks kind of skeptical of Gramps, don't you think?  Well, it might be good to keep an eye on him, he has tricks up his sleeve!

Enjoy today!

Friday, August 17, 2012

closer to the finish line

Feeling so good about getting to this stage with this quilt!  It's a small quilt, about 38" x 44", but all the blocks are hand stitched using the English Paper Piecing method.  Last night I finished all the handwork and started on the borders.  Finished up the borders this morning and took it outside for a little fresh air on this beautiful morning.  This will be a class series that I will teach at Bear Patch starting in September and I hop to have the quilting and binding done by then.  Any bets on that?


The rest of this day is going to be spent sharing quality time with my husband, Bob, since we seem to have been lacking in days off together all summer long.  We have made a list of several things that we would like to get to do before the good weather runs out, so today we will cross something off that list! What is left on your summer bucket list?

Monday, August 6, 2012

my best pizza so far

One of our favorite meals is homemade pizza, and we usually have it as a go-to meal on weekends, most likely Sunday night.  So last night found Bob and I settling down with some slices and Olympics. We don't do real fancy, but have found success with a basic formula.  First, the pizza stone is a key element since we like a thin and crispy crust.  This stone has been well-tempered over quite a few years.  I think I bought it at a home party for some company, feeling a need to select something from the catalog offered by a friend or neighbor.  You might have found yourself in that spot sometime, not wanting to say "no" to the invite nor all of the products, but wanting something not purely decorative.  That's how I ended up with a lovely Longaberger wastebasket!  Which turned out to be a good choice, as well as the decision to buy the pizza stone.  We really don't use the stone for anything else, although I am told that it can be used for cookies, etc.  Anyway, back to the pizza!  I used to make dough from scratch, but now I pick up a tube of pizza crust in the refrigerated section at the store, and that works just fine.  Last night I even used store-bought pizza sauce, although we often use red sauce that Bob makes and freezes from our own tomatoes.  My half of the crust is vegie and soy, Bob's half is sausage, pepperoni and lots of mozzarella!  My usual ingredients are chopped red onion, black or kalamata olives, artichoke hearts, peppers and whatever else is handy!  Last night I had the inspiration to top it off with sweet corn cut from the cob, and it was fabulous!!  Toss on fresh basil from the garden and soy cheese, and yummo!


 I have been in a mood to experiment with some fabric and rulers this morning, and by cutting table is getting deep with inspiration!

I know that I have seen lots of patterns for quilts made from tumbler blocks lately, so thought I should jump on the bandwagon.  I already used a great Creative Grids ruler for tumbler block placemats.  Then I encountered the Marti Michel tumbler template and wanted to try that out.  The beauty of this template is that it is sized for 2 1/2" on up to 6 1/2".  The little piece on the left is cut from 2 1/2" leftover strips from quite awhile ago.  I'm playing around with ideas for what to make from it.  Right now it's looking like a tabletopper but that's open for discussion!
 Next I experimented with this odd-shaped ruler from Creative Grids, it's much like the TriRecs rulers that I have used before but with a twist.  This is all in one unit, and the sizing guidelines are very easy to read and understand.  It can be used for strips from 1 1/" to 6 1/2".


 There are numerous setting options for these shapes, but I was drawn to this one that looks sort of like a flower.  If a circle is appliqued to the center it looks even more flowerlike.  I made the large size, a 12" block, and then smaller and smaller--
 The littlest one is 2" square, and while it was a good thing to try, I'm not going to be whipping out any more of those!  There's more fabric in the seam allowances than what's showing in the finished block!  I did sit down with EQ6 (Electric Quilt) to play with some sizes and colors and layouts on paper, there could be some potential there.

Yesterday I finished quilting a sample quilt of Jelly Jive for the store, the fabrics have the kind of shabby chic look.  I have made this pattern before, it is perfect for a "jelly roll" (40 - 2 1/2" x 40" strips) plus binding and backing.

And making more progress on the hexagons--
 I have all the rows sewn together and started putting in the blocks around the edges.  I am writing this as I go so I can share and teach it for a class at the store.  I picked a light blue to fill in the outside blocks and then a brown floral for a border.  I am having to engineer the blue block shapes from the other basic shapes in the quilt.  I am doing this because I wanted to continue those light colored triangles that make star points around each hexagon, instead of just finishing off with a straight line at the last hexagon.

A fun week ahead with a trip to San Francisco with Ben, Brita and Ian!  B&B will be attending a wedding while Ian, myself and Jan hang out in the city.  I hope Ian is ready for some fun!  From this little video, it looks like he is learning some new moves!

Sunday, May 27, 2012

iris on display

Enjoying a fine day with sunshine so far--yesterday turned out to be a stormy day around here.  We have had an unusually wet spring which is raising the lake and stream levels back to where they should be.  But yesterday when I left the house to go to work, I noticed that I had some iris blossoms showing and I was afraid that when I came home they would be damaged by the wind and rain.  But I was pleasantly surprised to find them looking just fine, so this little spot must have been skipped over by the worst of the weather.  I know there was plenty of thunder, lightning, rain and wind over in White Bear Lake while I was crossing my fingers that the power would not go out and screw up our computers!


So this morning I went out to bring in the best of the blossoms.  I don't have much else for the bouquet right now, I did find a few hosta leaves that have escaped the hungry deer that sneak into the yard.  They really feasted on the early leaves, but we are working to keep the deer repellant spray in good supply and the plants are making a comeback.

I have a new recipe (new to me) to share with you--
Mixed Nut Bars


Surprise, surprise, it's for a dessert!  My weakness!  I don't make desserts as often as I would like because I end up eating most of it myself, Bob is no help at all when it comes to consuming sweets.  This pan of goodness is made from this basic recipe:
Mixed Nut Bars 
1 ½ cups flour
¾ cup brown sugar
½ cup butter
1 can mixed nuts

Syrup:
½ cup white Karo syrup
2 Tbsp butter
1-6 oz. package butterscotch chips

Mix flour, brown sugar and butter.  Bake at 350 for 10 minutes in a 9 x 13 pan.  Cool for 10 minutes.  Pour on can of mixed nuts.  Melt ingredients for syrup over low heat.  Pour over crust and mixed nuts.  Bake another 10 minutes.


This recipe materialized after my quilt club's spring retreat because someone made it to share.  Even though I couldn't attend, I can still appreciate a good gooey treat!  My only variation this time was to use only cashews and peanuts instead of the can of mixed nuts, that way I wouldn't have to deal with all those other rogue nuts that I don't like so much!  It ended up with a great mix of sweet and salty, you might want to give it a try!

I'm getting serious about the hexagon project that I have been working on, and putting up some pictures over on the BP Blog if you want to take a look at what will be a fall class offering there.  

Also getting serious about patterns and fabric for the Quilt MN event coming up in August, not much to show so far but making progress.

Along with working on 3 customer quilts (one at a time!) my day is pretty well booked!  


I wonder what my favorite little guy is doing today?  I got to spend Thursday night with him, and managed to get a smiley picture when he wasn't too wiggly--seems that smiley and wiggly are nearly inseparable!  12 weeks old today!

Wednesday, February 29, 2012

keeping busy

Hoping that keeping myself busy will keep my mind off the fact that our little grandson seems to be dragging his feet in making an appearance!  No real significant worries or problems, just impatience.  We seem to have probably missed the chance for a Leap Year birthday, which has pros and cons.

So I have added a few more blocks to my growing collection of hexagons--


 I try to keep a few pieces prepped ahead and bagged up so I can take them along in case I have some time to sneak in some stitches, say, for example, in a hospital waiting room!  I pick colors and fabrics, cut out the needed pieces and glue baste the fabric to the paper templates.

Also made a little quilt for the store from some nice batik fabrics, it is called Lover's Lane by Villa Rosa Designs.


I have put together a quilt top called Jelly Jive by Pieced Tree, it is made from a jelly roll pack called California Girl by Moda.  I am waiting for the bolts of this fabric to come into the store for the backing and binding.  It is a very nice soft color combo.


And little quilt top came home to me after being displayed at the store for quite awhile, I had sort of forgotten how much I really like it.  It is a pattern that I wrote and called Story Territory, with the intent of interacting with a youngster and using all of the interesting fabrics to trigger story-telling and games. Even alphabet games and counting games.  I had a lot of fun picking all of the prints that I thought would engage a child's mind.

Does it look like fun to you?

Thursday, January 26, 2012

hexie

I do admit to having a fascination with these little shapes.  Not sure what the appeal is, but I can be looking at a whole wall of quilt blocks, and my eye will go straight to a hexagon first!

Many little hexies all in a row--
don't worry about all the little corners poking out.
They will be on the back side.


I have been working on the early stages of a project that I plan to pull together as a class for Bear Patch, probably starting in the fall.  It will be set up as a series of classes and is based on a design I saw at last fall's Quilt Market in Houston.  It comes all the way from Australia, and is destined to be fun!  I will teach the English paper piecing method to create many assorted blocks.  I am working on samples in 2 very different themes.

Civil war reproduction fabrics
My favorite brights
 These blocks are 2 1/2" size, that is the measurement of each straight size.  The layout and combinations of blocks are up for grabs, so I am thinking of using the more traditional type of setting with the civil war prints, using a neutral colored triangle between the blocks.  


For the more contemporary-looking brights, I am experimenting with a setting that will create a ring of white around each block.  I have a way to go to make enough different blocks to work into a reasonable size.  It won't be a king size quilt, this I know for sure!

Sunday, October 16, 2011

early sunday

I woke early this morning, early for a Sunday, and decided to stop fidgeting and just get up. It is so dark again at this time of day, and earlier and earlier in the evening. I feel the winter solstice creeping up. As much as I absolutely love the looong days around midsummer's eve, there is a certain appeal to this time of darkening, too. Not much I can do to change it, so gotta love it!

I recently picked up a new book, Style Stitches by Amy Butler. I do love my bags, and am always on the lookout for the next best bag. I picked a little zip bag for my first project from this collection of bags, thinking that I could usea new little purse pack to keep my necessary things (chapstick, nail clipper, mints, etc.) in one easy spot to be transferrable to other bags. This turned out fairly well, I think the only stumbling block was the fact that it was pretty small to easily work with the details of pleating, lining, curves, bands, topstitching, pocket inside, tab loop and zipper. But it's done and serves the purpose, so I'm happy.

I dug up a little wrist strap, probably a camera attachment, to finish it off. I think there will be future bags coming out of this book--stay tuned!

Now I want to share a recent find with you, and declare my intentions--

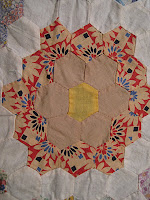
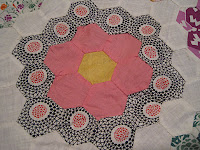
I acquired this unfinished vintage Grandmother's Flower Garden quilt top and have been thinking about what to do with it. It is a traditional quilt using the hexagon shape, but very different than my other recent ventures with hexagons. The overall look is appealing, and it is plenty large--larger than the pool table/cutting table top. About 175 blocks according to my estimate. It does have some issues of poor construction, like blocks that won't be flat, a few holes and stains, etc. Some good examples of "make it work" construction by someone who wasn't afraid to put her own brand on a quilt by straying from the rigid rules of fabric placement!

But overall, very charming, and certainly an accomplishment even in its unfinished state. I don't know the history behind it, but I will try to learn a little more about the era of these fabrics so I can at least put some kind of date to it.


I determined that it really would not turn out very nicely to even try to make it into a quilt in its present condition. It is hand stitched without the benefit of accurate cutting and/or seams, resulting in some very odd angles and shapes in some places. But these fabrics have not only sentimental value but real value that could be preserved as a little bit of women's history. I have been having an internal debate about what to do with it. You see, I have this friend, Maggie, who encountered something similar awhile back. She decided to dismantle the blocks, clean the fabrics, re-cut and re-make them. I was sure she was nuts to take that on. But she did complete it, and it turned out beautifully. And she doesn't seem to have lost too much of her sanity! So I have started taking apart a few of the blocks to see what happens. They are a bugger to take apart, trying not to tear anything, slow going. I have decided for the time being to salvage only the colored fabrics and set aside the white muslin rows. I could more easily just replace the muslin hexagons without taking apart the old ones. I took apart one block a couple days ago, using 3/4" hexagon papers to reconstruct it. That worked, so now I am soaking 4 blocks worth of little hexagons in Vintage Textile Soak and will continue with the process. This could be a long process, ending when I am either completely done with all the blocks or completely sick of it! But I am thinking that it will be worth the effort in the end, and I could end up really liking this!

We are looking forward to a fun day today, with a ~3 hour drive to Jackson for the fall hayride hosted by Larry and Denise. Lots of other family members show up for a tour of the backroads and waysides, ending with a weinie roast and s'mores! Can't wait, I have my hotdog substitutes ready for the road, since I don't think that tofu hotdogs are on Larry's list!