Showing posts with label hand quilting. Show all posts

Wednesday, January 3, 2018

the hand quilting frame-up

When Bob and I were visiting my mom for Christmas, we got to help her set up and mount a new quilt on the frame for hand quilting.  This is going to be a "big boy" quilt for Jack, who is now 3.  It's larger than a standard queen, so she needed new poles that were longer.  They are standard bannister railings from the lumber yard.  
I'll see if I can kind of lay this out in steps for you.  You don't find instructions for this sort of thing very often, she does it all by memory from years ago when her mom did quilting on a frame similar to this.


1.  The backing, batting and quilt top were all laid out smooth and flat on the floor.  We put some pins through the backing into the carpet to help hold it in place and try to prevent it shifting and causing wrinkles. 
2.  We used lots of safety pins to secure the 3 layers together all over the quilt, about 6-8 inches apart.  It's important to get all the way through to the backing fabric but not attach it to the carpet!
4.  Mom had prepared the fabric for the leaders - strips stapled to the wooden poles which then serve as the way to attach the quilt to the poles.  She used a strip of fabric from a sheet, I think about 4" wide and pressed in half.  The cut edges are stapled down, leaving the folded edge for the quilt to be pinned to.  You have to make sure that the strip is real straight on the pole, and this is one reason the hand rails work great.  They have one flattened surface, and we used that as a landmark to keep it straight.  I think this part was the hardest, even with a very good staple gun it was easy to get them only partially punched in.  I'm really glad Bob was handy to help with that.


5.  After the fabric was attached to the poles, we laid the pole on the floor by the quilt.  The backing was just barely big enough on this quilt, but we made it work.  We aligned the raw edge of the quilt top with the stapled edge, then safety pinned through the layers into the leader strip on the pole.  This has to be attached with safety pins only a few inches apart, to keep it from having too much stress or stretch at any one spot.


6.  Repeat the same process with the pole and stapling and pinning on the opposite end of the quilt.
7.  We had 2 people rolling the quilt onto a pole with the other person holding the opposite end to keep it a little bit taut, but not too much.  The rollers have to go slowly and make sure it is staying straight and even as they go.


8.  The 2 poles are then lifted up and someone has to hold them while another person lines up the "legs" of the frame.  The legs are kind of like a cross with a wider base.  The cross piece of wood has openings for the hand rails to be slid into at each end. 

9.  After the quilt is in place and the frame is supporting itself, there are large screws (the thing with the metal ring in the closest part of the picture above) that are tightened up.  This keeps the poles from rolling while the quilting of a section is done.  Then they can be loosened to advance the quilt and roll it around the second pole.  Eventually, the whole quilt gets rolled onto the second pole as the work progresses.  In the picture below, mom uses a screwdriver through the ring to get it good and tight.  I forgot to mention that she also places wooden wedges with the pole into the hole to get it tight.  She taps those in with her pliers.

10.  You can probably see in the picture below that there are some rubber bands laced around little pegs on the top side of the cross piece.  She uses them hooked over safety pins in the edge of the quilt to keep it taut while she's working in that area.  Also, you can see part of the tilting mechanism that allows her to tip the quilt top at an angle to work on it more comfortably.  She listens to a lot of recorded books from the library while she stitches.  She's had some shoulder pain this fall, and has had to sometimes limit the amount of time she can stitch so it doesn't get worse.


So that's pretty much all I know about using a hand quilting frame and how to get a quilt mounted on it.  Now comes the real art of hand quilting!

Sunday, September 17, 2017

retreat wrap-up

Last weekend, my mom and I attended a quilting retreat at Bridge Creek Cottage in Augusta, WI.  We've been there before with essentially the same group, so it's nice that mom has this circle of friends away from home.  She doesn't have a regular sewing group at home, so this is a good chance for her to have some fun with the rest of the quilting group.
She was very busy and productive!  She made all the blocks and put them together for this pretty quilt that will go to a great-granddaughter.  She started picking some of these fabrics while we were on our trip to Sisters, OR.  At Bear Patch, she added more fabric selections.  The pattern is by Terry Atkinson and is called Birthday Presents.


Last night she sent me this picture --

She added the blue border, layered it with backing and wool batting, got it rolled onto her quilt frame and has started the hand quilting!  She's going to see this little great-granddaughter, Elsa, who lives in CA, this winter so she wants to have it done to take along.  After that, she will get going on quilting the one she's already put together for great-grandson, Jack.  She is on a mission to make each of her great-grandkids (6) a "grown-up" quilt that will fit a big bed and be suitable for them at a later date.

 I did some sewing on those 3 1/2 days, too!  Here's what I worked on:

A Christmas wallhanging with fabric and pattern by Sandy Gervais, to use in the Christmas display at the store.  This needs some interesting quilting in all of the white space.  Little buttons will be sewn to the tops of the trees and hats.
The back is also pieced with a star, but I didn't get that done yet.
Here's something that had been waiting for me to sew together for awhile.  This is called Hexagon Shuffle, and it's a free pattern from Moda that came with a pack of the solid colored pre-cut hexagons.  The 2 rows on the left are completed and sewn together.


I had worked on these stockings last year and finished 3, but I had 3 left to do.  They were mostly done, but needed finishing up.  They still need buttons for eyes on the moose and squirrel.  Then they are ready for gifts!  Pattern is Stopping By The Woods by Laura Heine.

This quilt started out as demo samples for using a special ruler, the Curved Slotted Ruler by Creative Grids.  I had prepared several "step-out" samples to show the process of making a block.  After the demo, I hung onto the pieces.  I figured out I had enough material to make several blocks, and this is what I ended up with.

This is not a sewing project at all, but it does involve fabric!  This is a piece of wonderful woven cotton flannel called Mammoth Flannels by Robert Kaufman.  It's available in many colors and designs of plaid, and I've used this for samples at Bear Patch last winter.  They make great winter scarves by just raveling a fringed edge.  This particular piece was from a bolt I spied at Stitch Supply Co. on the way to retreat.  It was a color combination I hadn't seen before and really called my name!  So 4 scarves were born!

This picture isn't very flattering, but it's 2 little laminated Trash Stash bags that were another old project just waiting for me to finish!  They have a little hanging loop.  I use one by my sewing machine and one in the car.  The laminated fabric came from Bear Patch, and we used the pattern  as a make-and-take project for a retreat.
Here's an amusing sight!  I sewed on my Bernina 820, which is one of the large bed machines so it's a little larger than some other machines.  Saturday night, I ran into some problems with bobbin tension that I couldn't figure out, even with the coaching of my friendly Bernina technician, Beth, by phone.  So I got to borrow a spare machine that Barbara had brought along.  It's a baby Janome!  It looks like my big machine just gave birth!  It sewed just fine, and is light as a feather.  I did get my machine straightened out Monday morning.  Well, actually, since the problem was operator error, I got myself, the operator, straightened out!

So, all's well that ends well, and this retreat was very fun!  By taking along some things that I had started before, plus a couple new things, I felt productive with my time.  I used to go to retreats more frequently.  For right now in my life, that can't happen, so it's good to get the chance to go to this one.  I don't get another quilting get-away until January, so I'll have plenty saved up to work on for then!

Saturday, August 6, 2016

out standing in the field

This is the best time of year to take a trip in my little area of the country.  It's many shades of rich green, crops thriving, everything's growing in the sun.  I love the long views whenever I am on a little rise.  Sometimes the best viewpoint is on a bridge at an interstate exit!  I was out at "the farm"-- it was owned and operated by my grandparents when I was a child, then my dad, and now my brother and his wife, Mary.  They do a wonderful job of maintaining and improving the land with their forward-thinking farming methods and conservation.  I caught this picture of the soybeans and the area set aside for wildlife.


And the roads are set out in neat grids, so they are often straight.  In this picture, I can see the trees way down the road that are a couple miles away.


Mary loves roses, and has developed a nice rose bed with several varieties, these are just 2--


They have to be very hardy to survive the wind, storms, snow and cold!

On another note, this is a quilt that my mom just finished.  It's about 80" square or thereabouts, made from 5" squares.  It's for her great-granddaughter, Aurora.  She has hand quilted it, with a shape or letter or number or object in each square.  The dark pink in the star and border is a paisley, which she quilted following the lines of the paisley shapes.  Now she just has to get it out to Washington for Aurora!


And I've done a little hand-stitching, too, working on a UFO that I wrote about here last year.  I basted the whole works to a background fabric, and I have been stitching the outside edge to the background, like an applique stitch.  I'm over halfway around.  Then I need to decide what to do.  I think I want it for the center of my dining room table, so I might put a very thin batting (or heavy flannel) under it with a backing fabric, then do some big-stitch hand quilting to hold the layers together.  I'm in no rush, so I will give it a bit more thought before I land on what I want.  The directions for the hexagon design were part of a sew-along from Sue Daley's blog over at suedaleydesigns.com.  It was called the Forget-Me-Not Sew Along, and you can get the instructions there at no charge.  I only did a portion of the sew-along, deciding that I didn't need a huge project!


Monday, April 4, 2016

trip to Iowa

I'm feeling kinda special right now, because I'm visiting my mom and she takes such good care of me!  Right now, she's out in the kitchen making chicken and something else really good-smelling for lunch.  Usually, my lunches are just done on a sort-of driveby basis.  Just a brief pause in the day without really counting as a sit-down meal.  But back when lunch was dinner and dinner was supper, an actual meal was planned and served for the middle of the day!

It's been cold and SO WINDY!  The lake is gray and sprinkled with whitecaps.  The wind has been over 30 mph ever since I arrived, and temps below 40, so not a good time to do much outside.  So, we occupied ourselves indoors, instead!


Mom has been hand quilting on this for a great-granddaughter.  Can you tell that she is a fan of purple and pink?!  It's not a complex quilt pattern, a large star surrounded by squares.  It's the colors and designs that make it interesting.  She is quilting little shapes and patterns and numbers into each block.  I hope it is cherished forever!


I brought along a hand sewing project that was started last year (or the year before).  I ran into it when I was gathering examples to use for an upcoming Intro to English Paper Piecing class.  Lots of diamonds left to do....


I have completed 3 of the 8 sections necessary, and made progress on #4.  I have all the fabric pieces cut and stacked in a box, but I'm in trouble.  When I went back through the pieces, I discovered that I didn't cut enough of this one---


I need 9 more diamonds, and I can't find any fabric remaining in my stash!  So this has hit a snag!  Now I go on the quest to find more of this fabric.  Does it look familiar to you?  I don't even know who the manufacturer/designer was, when it was purchased, where it was purchased, etc.
Would you do me a favor and look in your own stash for it, and ask anyone you know who owns a scrap of fabric if they might have it?  I had to do this once before, and by broadcasting my plea to the world wide web, I was lucky enough to find what I needed!  Here's hoping I am that lucky again!

Here's an interesting idea for you!
I found out about an app for altering photos into something more "artsy".  It's called Dreamscope and it's a free app.  They have a lot of different filters that can be applied to create different effects.  I don't think it's the easiest to use, and maybe that's because it takes some time to process the image.  I didn't think I had succeeded in making it work, but when I went back to it later, the bottom picture showed up.  So here is the before and after:


 Kinda' cool!

Saturday, February 15, 2014

miss match

Today I have been helping my mom get a quilt mounted onto her frame for hand quilting.  The quilt is going to be living with Dan whenever it is finished, and I got to help with picking out the design and fabric.  Dan had a say in what colors he wanted.

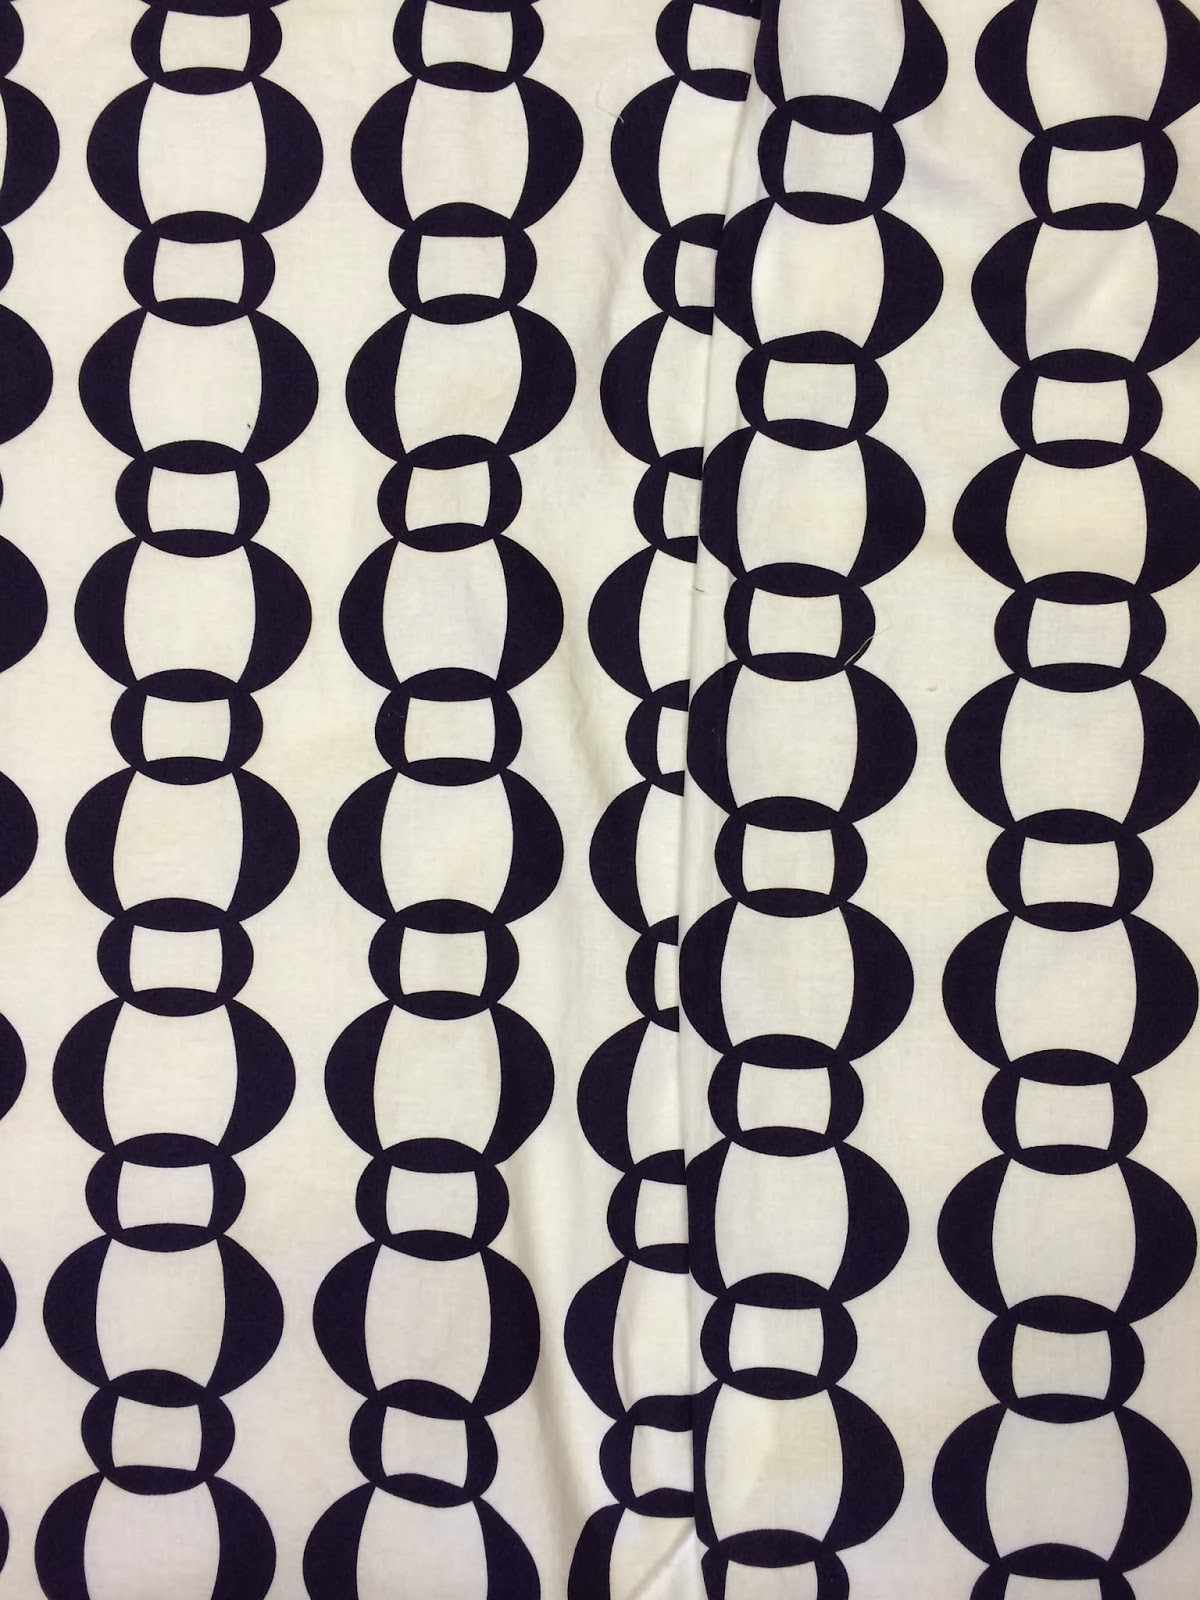
This morning I needed to put together the backing, and the navy blue and white fabric was what we are using.  In some situations, there isn't much of a distinct design in the fabric and the seams can be made without a thought to matching pieces.  But with this backing fabric, I really thought it would look so much better if it was matched both vertically and horizontally.

Here's an idea of how it looks without matching on the left and with matching on the right.  The seam in the picture on the right is barely visible, and the piece looks like one uninterrupted piece of fabric.


The process takes a little bit longer, but it's worth it.  I started out by ironing a crease where the seam will be sewn on one of the pieces.  I used the edge of the small circles as my guide and pressed right at that spot along the length of the fabric.  This gave me a seam allowance of about 1/2", but I didn't measure that with a ruler.  I let the fabric design be my guide.


Then I laid that folded edge on the edge of the other piece of fabric to see where the seamline would fall.  I lined up the circles on the piece of fabric on the right with the same circles on the fabric on the left.  This gives me a match both vertically and horizontally.


You can see at the bottom of the above photo that there is going to be a jog in the edge of the fabric to get the 2 pieces to match.  Only about 1" in this instance, because the design is a small repeat.  If you have a fabric with a larger repeat, you could be wasting a lot more, and you have to be prepared for that.  Sometimes I just don't have enough fabric to make this work, but if I am buying something for a backing and think I might want to do some matching, I will get an extra yard if possible.


With the 2 pieces right sides together, and the creased edge on top, I fold back the edge to the crease line to make sure I am matching the right spots.  Then I lay the folded edge down flat and pin freely along the crease.  I put my pins in vertically right on the crease, so I can lift the edge as I go and make sure things are staying where I want them.


I sew straight down that crease line, removing pins as I go.  A walking foot helps to keep the top layer feeding under the presser foot in sync with the fabric next to the feed dogs.


Then all that's left is trimming and pressing!  We laid out the backing, batting and quilt top on the floor and pin basted all over it.  Then we pinned the top and bottom edges to the fabric headers attached to the wooden roller bars--you can see part of one at the top of the picture.


Then we roll it up and insert the 2 roller bars into the holders, attached to wooden legs.  Now mom can sit by the window and stitch as desired!  That should keep her busy for a day or 2!  This is about 80" x 100".  Lots of stitches!