Two weeks ago I joined a group of friends for a retreat at Bridge Creek Cottage in Augusta, WI. We tried out these temporary tattoos.
 |
| My body art! |
 |
| Assorted adorned quilters' arms. |
One of the quilts I worked on at this retreat was derived from a pattern I made in 2010. After publishing the pattern for this quilt, I added a modification for a little baby quilt using the center portion. By changing up some of the fabrics, I gave it a new look.
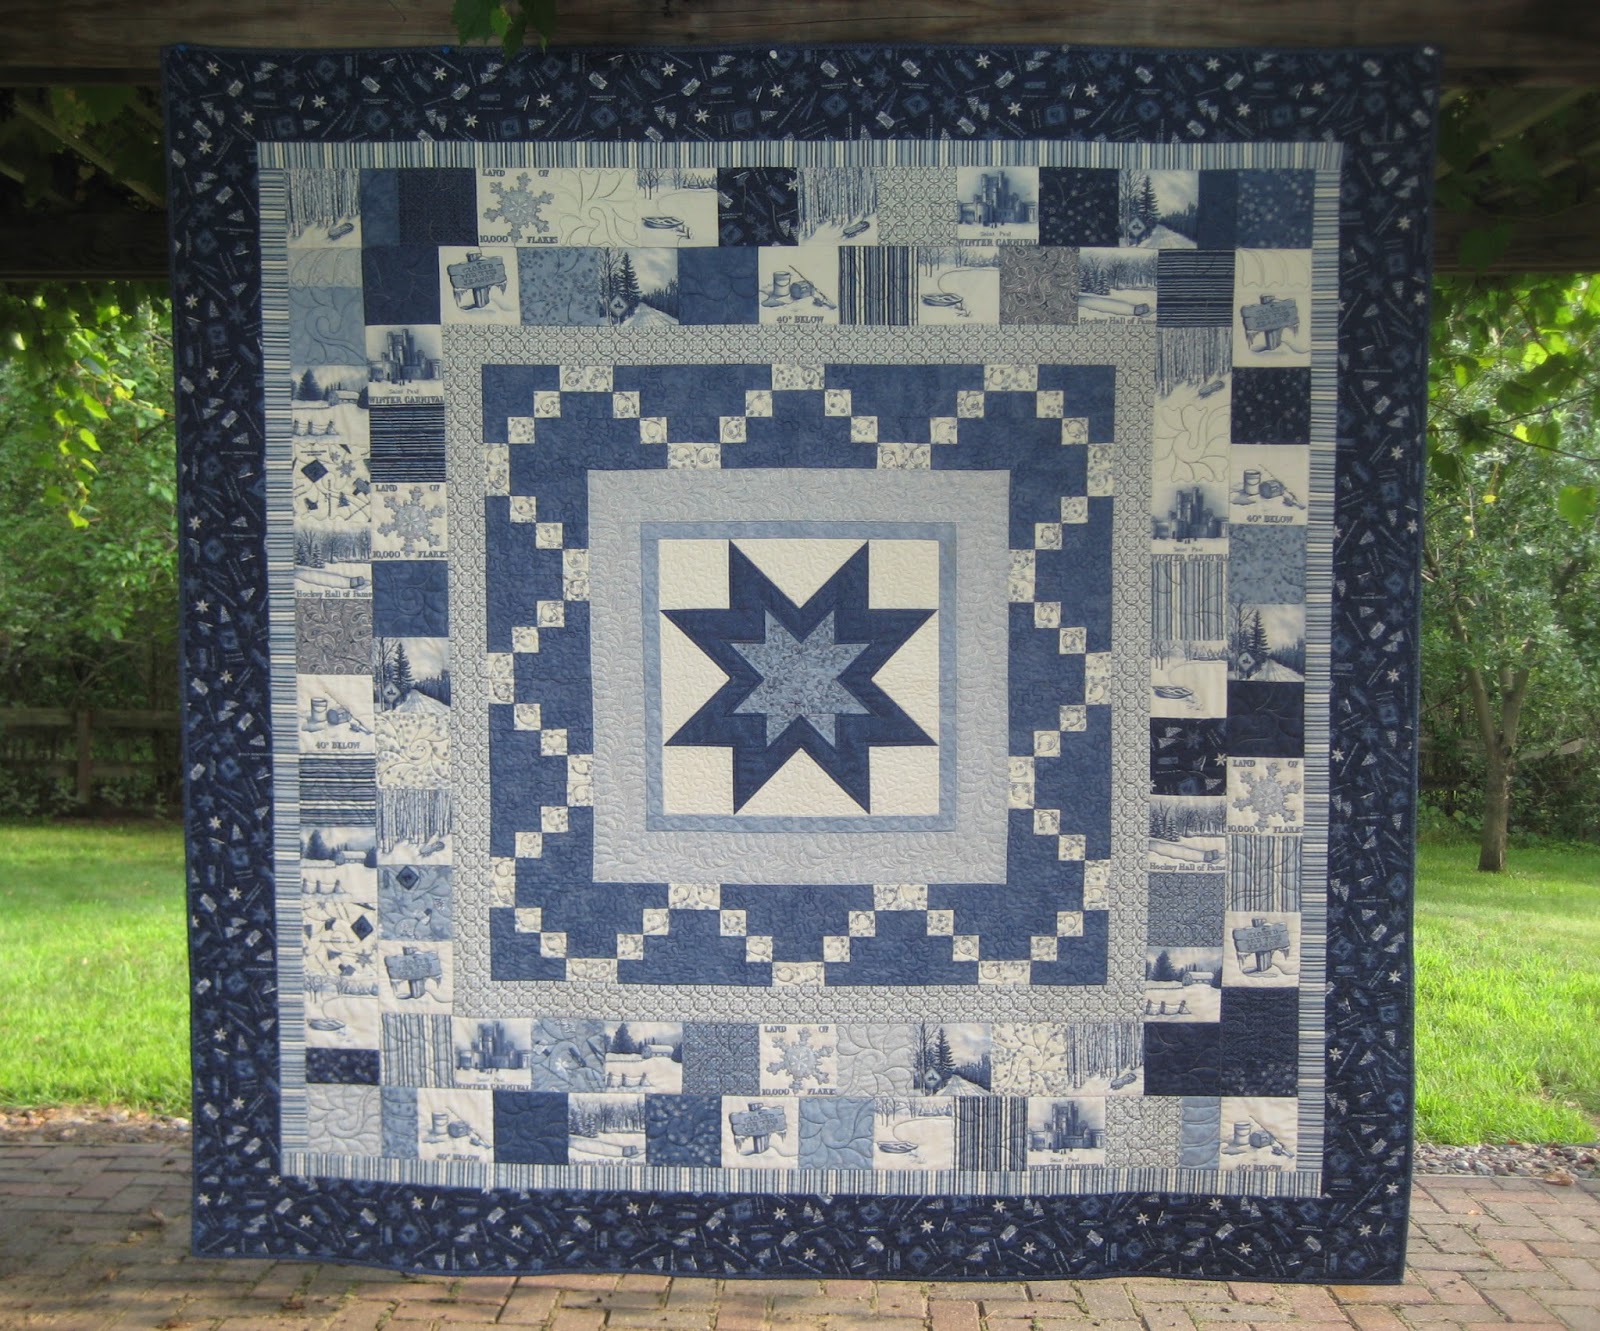 |
| Star Light, my design for Quilt MN 2010 |
This is the baby quilt version. It's for a little girl due in December! My nephew, Scott, and his wife, Katie, are having their first baby. Scott is the son of my sister, Jan.
This will be quilted very soon and finished right around the time that this little princess arrives! They are using nursery colors around the theme of the vintage Peter Rabbit pictures and storybook, so this will hopefully fit with that. They live out near San Francisco.

I tackled another new project, too. My machine got a good workout making 8 owls. Each of those eyeballs has about 20 pieces in it!

I was relieved to get them all done, except for that poor fellow on the left. I made a mistake in the cutting and didn't have the extra fabric along with me to correct the problem while I was there.

 |
| Forest Friends by Elizabeth Hartman |
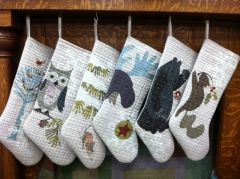
I picked up and worked on a project that I had started last year. I made 3 of the 6 stockings in this pattern by Laura Heine. See the full set below. These will be displayed at Bear Patch for our Christmas window.
 |
| Stopping By The Woods by Laura Heine (Fiberworks) |
Here's something I started working on when I got back home--my little grandson, Ian, is going to be moving to a new sleeping arrangement soon. A new baby brother in the house in March means Ian (4) moves to a new bedroom and a bunk bed! He needs a special new quilt to make that move happen with ease, don't you think? He's really involved with super heroes right now, they are his favorite topic of play and entertainment. Thomas the Train is so 2015! So I ventured into the licensed prints aisle at JoAnn's. I was gobsmacked by the assortment there! I don't think I've ever been in that aisle before! I found some good choices for Ian's quilt, and drafted a simple design that keeps large sections of the characters intact. Here are some blocks on my design wall--

I showed him, via FaceTime, some of the fabrics and he was so excited!
I had been looking at a pattern for a little bag, Sew Together, by Sew Demented. I was a little hesitant to get it going because it had quite a few parts to it and I couldn't decide what fabric to use! I wanted it to be just the perfect fabric because I thought it would probably be the one and only that I made from that pattern! Do you ever have that feeling? I finally took the plunge and put all the pieces together.


It has 3 zippered compartments inside. I used mostly fabric from Cotton + Steel. And some Moda Grunge for the pocket lining. I added some beautiful ribbons on the outside for trim. It actually all went together very well, my only stumbling block was putting together that long purple zipper with the striped binding at the edge. I'm not real satisfied with my top-stitching for that. I did have some helpful coaching from my friend, Mary, who was at the retreat and has made this more than once. Thanks, Mary!
And here's something that is part of a much bigger plan. A little birdie, part of the Urbanologie quilt pattern from Sew Kind of Wonderful. It's made with the Mini Quick Curve ruler.

Can you find the birds in the picture below? I'm considering making this as a block-of-the-month class at Bear Patch in 2017. There are 12 different pieced units incorporated into the overall layout.
 |
So that pretty well sums up what's happening in the sewing world at my house! Today is the day before Thanksgiving, and I'm not scheduled to work but had thought I would go to the store anyway. It's closed, and I have to get working on changing the window display to our Christmas theme. It's nice to do that when there aren't customers observing the mess! But it snowed during the night, and has started snowing again as I write this. So I probably won't be driving the 30 miles to do that. Instead, I will make it 10 miles to the grocery store to get what I need to make my pumpkin dessert for dinner tomorrow at my brother's house! Priorities, you know! And that will leave me more time for sewing at home!


